Farm, Project

Raising the Garden Bar

Spring has finally sprung here at Furry Feathers Farms.  It is time to get going on spring planting and spring projects.  The late snow storms and cold weather adds the feeling of being behind.  So let’s get started.

We have decided to start using raised beds in the garden this summer.  You get lots of benefits from raised beds.  They allow for better drainage.  You get to choose the soil mix. When you need to add amendments to the soil, there is less place you will have to work. Among many other benefits.

We have very heavy soil.  It is a very dark, heavy clay.  While there is probably a lot of fertility in the soil, it also makes plants trying to root have a hard time getting started.  We have had some good success when we have added to the soil to loosen it up.  So that is why we are going with all raised beds.

Using our Raised Bed Estimator tool, we figured out that we need about 12 beds.  The next step was figuring out how to build and fill the beds.  Some of the materials that can be used for the sides of the beds are treated lumber, cedar, pine, rocks, or metal.  There is some concern if the treated lumber is 100% save to use and if the lumber will leach into the soil and into your food.  Cedar boards are naturally rot resistant, but like treated lumber is an expensive option.  Making the sides out of same sheet metal that is used for pole barns is slightly more affordable and durable.

We decided to go with pine boards.  These boards are going to rot.  There is no getting around that.  The question is how long will they last.  I am guessing that we will get five years out of them, with the outside chance of getting more.  The cost and the expected lifespan makes it the right choice for us.
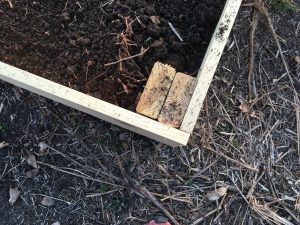
The beds are made of 1×10 pine boards with doubled up 2x4s in the corners.  The beds measure 4’x8′.   You don’t want to go any larger than 4ft.  This will allow us to reach across the beds and get to the middle from either side.  This method gets the beds up quickly.

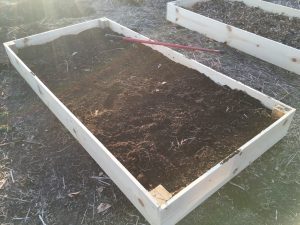
The next step is how to fill the beds.  My brothers deposited all the leaves from their yards last fall at Furry Feathers Farm.  Leaves are a great source of compost, but the leaves themselves can also be a good source of fertility.  We are filling the beds with a generous layer of leaves at the bottom of the beds.  That is topped with a mix of our existing soil with a little peat moss to loosen the soil and some compost.  If you don’t have your own compost check with your local dump.  If they take leaves and grass clippings they will likely have a compost pile.  The local dump here the compost is free to take as long as you load it yourself.  Since it is composted I would not be concerned with any chemicals that people use on their lawn, but if you are it probably isn’t the best source for you.
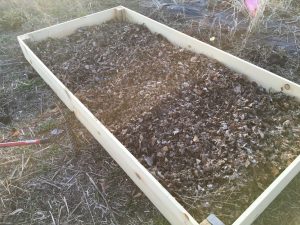
At this point, the only thing left is to get planting.  Let us know about your experience using raised beds in the comments.  We would love to hear about them.  
EO-Tip, Essential Oil

Portable Peppermint Tea

Peppermint is probably one of my favorite oils.  I use it all the time for many different reasons.  Many people know about all the benefits and reasons for drinking peppermint tea.  Well, there is about the equivalent of 27 cups of tea in one drop of Peppermint essential oil.  That made me think of the old commercials for Total cereal.

I like to keep a bottle of peppermint with me all the time.  You never know when you will need it.  Plus it sure beats carrying around all those cups of tea.

Farm

Raised Bed Estimator

We are going to try a new gardening method this summer.  We have very heavy clay soil and it makes gardening a challenge.  It is simpler to fill the raised beds with the type of soil you want then trying amend a large garden plot among other benefits.  The question I was having was how many raised beds do I need?

I could find a lot of information on the spacing of plants in raised beds.   I found information on how many square feet per plant was needed. I could find information on the number of plants per person to plant.  What I couldn’t find was a place that combined all the information in one place.  So I put together a tool that does.

The simplest way to use the tool is to change the number of people in your family down in the bottom left.  The tools will spit out the number of 4’x8′ raised beds you will need to build.  The tool also allows you to make customizations.

The next two fields to the right of the number of people are for the size of the raised beds you would like to build.  You can enter the width and length of your beds.  Once those are changed it will automatically adjust the number of raised beds you will need.

If your family has certain vegetables you really like and some that you really don’t care for you can adjust the number of plants per person to plant.  These changes will also all change the number of raised beds automatically.  When planting in a raised bed you can generally be more aggressive with the spacings on your plants.  The numbers on the tool are taking that into account.  You could also adjust those if you would like.  The spacing is done in inches.

I hope this tool is useful to you.  If you would like to add a different vegetable to the tool, please let me know and I will get it added.  You can just leave it down in the comments down below.  I would also like to know any feedback or results you have when using the tool.  Once again please leave them down in the comments below.

Get the tool here.

Featured, Recipes

Cloud Bread

This is a great recipe for a great gluten-free bread.  It only has three ingredients and a few easy steps.  It produces a light and fluffy bread that works great for sandwiches.  My family really likes the recipe.  The results are amazing, it would be amazing even if it was a much more complicated recipe.  Since it is so simple the results are almost unbelievable.

Cloud Bread

This is a quick grain free bread that produces a light fluffy bread that will remind you of a croissant.

Servings 6

Ingredients

  • 3 Eggs seperated
  • 3 tbsp Cream Cheese
  • 1/4 tsp Baking Soda

Instructions

  1. Preheat your oven to 350 degrees.

  2. Add the baking soda to the eggs whites.  Whip the egg whites to stiff peaks.

  3. In a mixer bowl combine the egg yolks and the cream cheese.  Beat them together until they are completely mixed.

  4. Fold the egg yolk mixture into the egg whites.  Just until they start to come together.

  5. On an oiled baking sheet place a spoon full of the batter.  Using the back of the spoon flatten the batter and shape it.  This will be a little like making pancakes.  Hint: The batter will puff up a little while cooking, but it won't spread out or shink.  Make them the desired size.

  6. Bake for 15-20 minutes or until they are golden brown.  Remove to a cooling rack and a allow them to cool completely before putting them in a storage container and placing them in the frig to finish cooling.  

Featured, Recipes

Chicken Salad with Grapes and Pecans

Chicken salad is a versatile dish. It is great in a sandwich or as a topping for crackers.  In my opinion, the best way is just on a spoon.

This one gets a little extra sweetness from the grapes and a nutty crunch from the pecans.  I like to use dark meat but you can use white meat as well.  I roast the chicken with the bones and the skin.  I let the chicken cool before picking it off the bones.  I don’t put the skin in the chicken salad.


Chicken Salad and Grapes and Pecans

Ingredients

  • 6 Cups Shredded Chicken
  • 1 1/2 Cups Pecans finely chopped
  • 1/3 Cups Green Onions chopped
  • 4 Cups Red Grapes halved
  • 1 Cup Mayo
  • 1 Cup Greek Yogurt
  • 1 tsp Paprika smoked if you have it
  • 5 drops Lemon essential oil
  • 5 drops Dill essential oil
  • 1 tsbp Dijion Mustard

Instructions

  1. Combine the chicken, pecans,  onions, and grapes

  2. Mix together the mayo, yogurt, essential oil, mustard, and paprika.  Pour over chicken and combine completely.  

  3. Season to taste with salt and pepper.

  4. Refrigerate for 2 hours to allow the flavors to combine. 

Featured, Recipes

Creamy Tomato Basil Soup


Creamy Tomato Basil Soup


Ingredients

  • 6 Cloves Garlic miced
  • 3 Cans (14.5 oz) Crushed Tomatoes
  • 1 onion diced
  • 2 Cups Chicken Broth
  • 1 Cup Heavy Cream
  • 1/2 Cup Parmesan cheese
  • 10 Basil Essential Oil
  • 2 tbsp Butter

Instructions

  1. Melt butter over medium-high heat.  Add the onion.  Add 2 pinches of salt.  Cook until softened.  Then add the garlic.

  2. Add the tomatoes and chicken broth to the pot.  Simmer for 20 minutes.

  3. Remove from heat.  Add the basil essential oil and the cream.

  4. Serve with the parmesan cheese as a topping.

Featured, Recipes

Lemon Lavender Bars


5 from 1 vote
Print

Lemon Lavender Bars

Ingredients

  • 1 Cup Flour
  • 1/3 Cup Powdered Sugar
  • 1 tsp Salt
  • 1 stick Butter
  • 1 Cup Sugar
  • 3 Eggs + Egg Yolk
  • 5 drops Lavender Essential Oil
  • 10 drops Lemon Essential Oil

Instructions

  1. Preheat over to 350 degrees and prepare a 8x8 baking dish.

  2. To your food processor add 3/4 cups of the flour, powdered sugar, and 3/4 tsp of salt.  Pulse to combine.

  3. Cut the butter into pats and add along with the lavender oil to the flour mixture.  Process until the mixture forms crumbs.

  4. Press mixture into the prepared baking dish.  Bake in the oven for 25 minutes

  5. While the crust is baking, combine the sugar, eggs, yolk, lemon essential oil, the remaining 1/4 cup of flour and 1/4 tsp salt in a mixer and beat until smooth and well combined.

  6. Pour the filling over the baked crust and bake until set.  About 20 minutes.

  7. Cool then refrigerate for an hour to allow to set.

Recipes

Spring Greens Caprese Salad


Spring Greens Caprese Salad


Ingredients

  • 10 oz Spring Greens Mix
  • 8 oz Mozzarella Cheese sliced
  • 4 Roma Tomatoes sliced
  • 1/2 Cup Balsamic Vinegar
  • 1/2 Cup Olive Oil
  • 5 drops Basil Essential Oi

Instructions

  1. Whisk together olive oil, vinegar, and basil essential oil to form a vinaigrette.

  2. Combine the greens, tomatoes, and cheese.

  3. Toss with vinaigrette to taste, or server with vinaigrette on the side.

Recipes

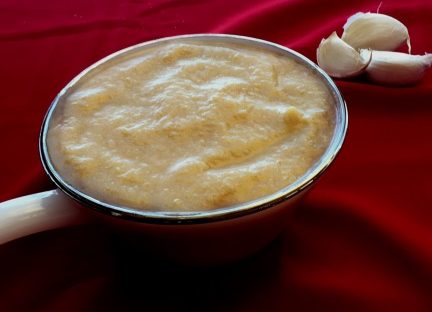
Creamy Roasted Garlic Cauliflower Soup


Creamy Roasted Garlic Cauliflower Soup

Here is a quick and creamy soup.  Perfect for a cold day and quick enough to put together after a hard day at work.

Prep Time 5 minutes
Cook Time 25 minutes
Total Time 30 minutes
Servings 6

Ingredients

  • 2 bulbs Garlic
  • 1 Large Onion diced
  • 2 Carrots peeled and chopped
  • 4 cups Chopped Cauliflower
  • 5 drops Thyme Essential Oil
  • 5 drops Rosemary Essential Oil
  • 3.5 cups Chicken Stock
  • 2 tbsp Butter

Instructions

  1. Preheat your oven to 400 degrees

  2. Remove the very top of the bulbs of garlic, exposing the top of all the cloves.  Wrap the bulbs in foil and place in the oven.  Roast the garlic for 35 minutes. 

  3. Melt the butter over medium-high heat.  Add the onions and the carrots to the pot.  Add two pinches of salt.  Cooking until they are soft.   About 6 minutes.

  4. Add the stock and the cauliflower to the pot.  Squeeze the garlic into the pot.  

  5. Simmer until all cauliflower softens completely.  About 25 minutes.

  6. Move the mixtures to a blender.  Blender until smooth.  

  7. Pour the soup back into the pot.  Add the essential oils to the soup.

  8. Season with salt and pepper to taste.

Uncategorized

Anchors

We recently had a birthday party for my oldest and youngest daughter.  As we planned the party we started to think about what we could serve.  We wanted to have things that fit into the different dietary needs of the whole family.  Considering that and the fact that I am a bit adventurous when it comes to food, we decided to cook a whole hog.

So I started doing all sorts of research on how to cook a whole hog.  It turns out for every person that writes about it there is a different way of doing it.  I picked out all parts of the different methods that made the most sense and honestly seemed the simplest.  The point of this post isn’t to talk about the process. (I may do a post in the future about that.) It is to write about the results.

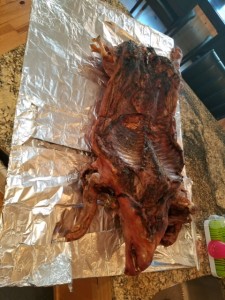
IMG_1655 (1)Once the pig was done, my plan was to pick the meat off the pig and bring the meat in on a platter.  My brother Jon set me straight on that plan. He said we should bring it in whole.  I was glad he felt so strong on that.  It was 100% the right call.
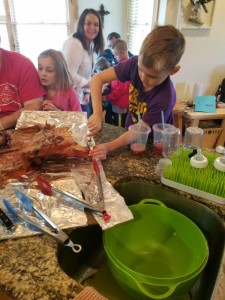
You might expect that there would be people that would be uncomfortable with seeing a whole pig, snout to tail.  I sure was thinking that, but everyone seemed to really get into the experience of it.  IMG_1657It was fun to watch everyone’s reaction and to watch the kids be completely fascinated by the different parts of the pig. It probably didn’t hurt that it tasted so good either.  I, as the good host, lead the way by trying one of the eyeballs.
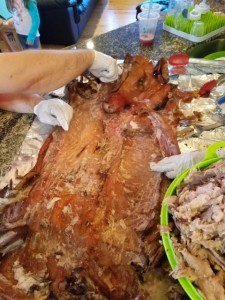
My hope is that it gave people an experience and a memory that we can recall as a family for years to come.  It will sure stick in my mind.  It will be an anchor used for me recall that party and that time.  These get-togethers can take big commitments for the people putting them on as well as the people attending.  After this party, I better understand that it is important to have anchors for these parties.  We might as well put in a little more effort and have some strong memories of them.IMG_1658

I would like to hear from you about things you do to provide these anchors.  Please leave them in the comments below.